One Room Challenge - Yes A Boxwood Wall...
Hello there friends! We have made it to week FOUR of the One Room Challenge! If you have been checking in with me every week, thank you so much for following along! And if you are just tuning in, you might be wondering what all this One Room Challenge talk is about! It is a 6 week challenge for design bloggers to tackle and FINISH one room within their home or client's home! It is such a fun experience and the cheers and motivation from the One Room Challenge community is fantastic! For this fall season, I am taking on my home office! The goal is to transform it to a fun place to work and feel inspired! You can check out our previous posts here and get yourself up to date on all the progress...WEEK 1, WEEK 2, WEEK 3.
Let's take a little trip down memory lane to check back on where we started! You remember the before...

Not too shabby but cluttered and heavy feeling! I wanted a work space that had a more bright and happy vibe! So here is the design plan that I put together!
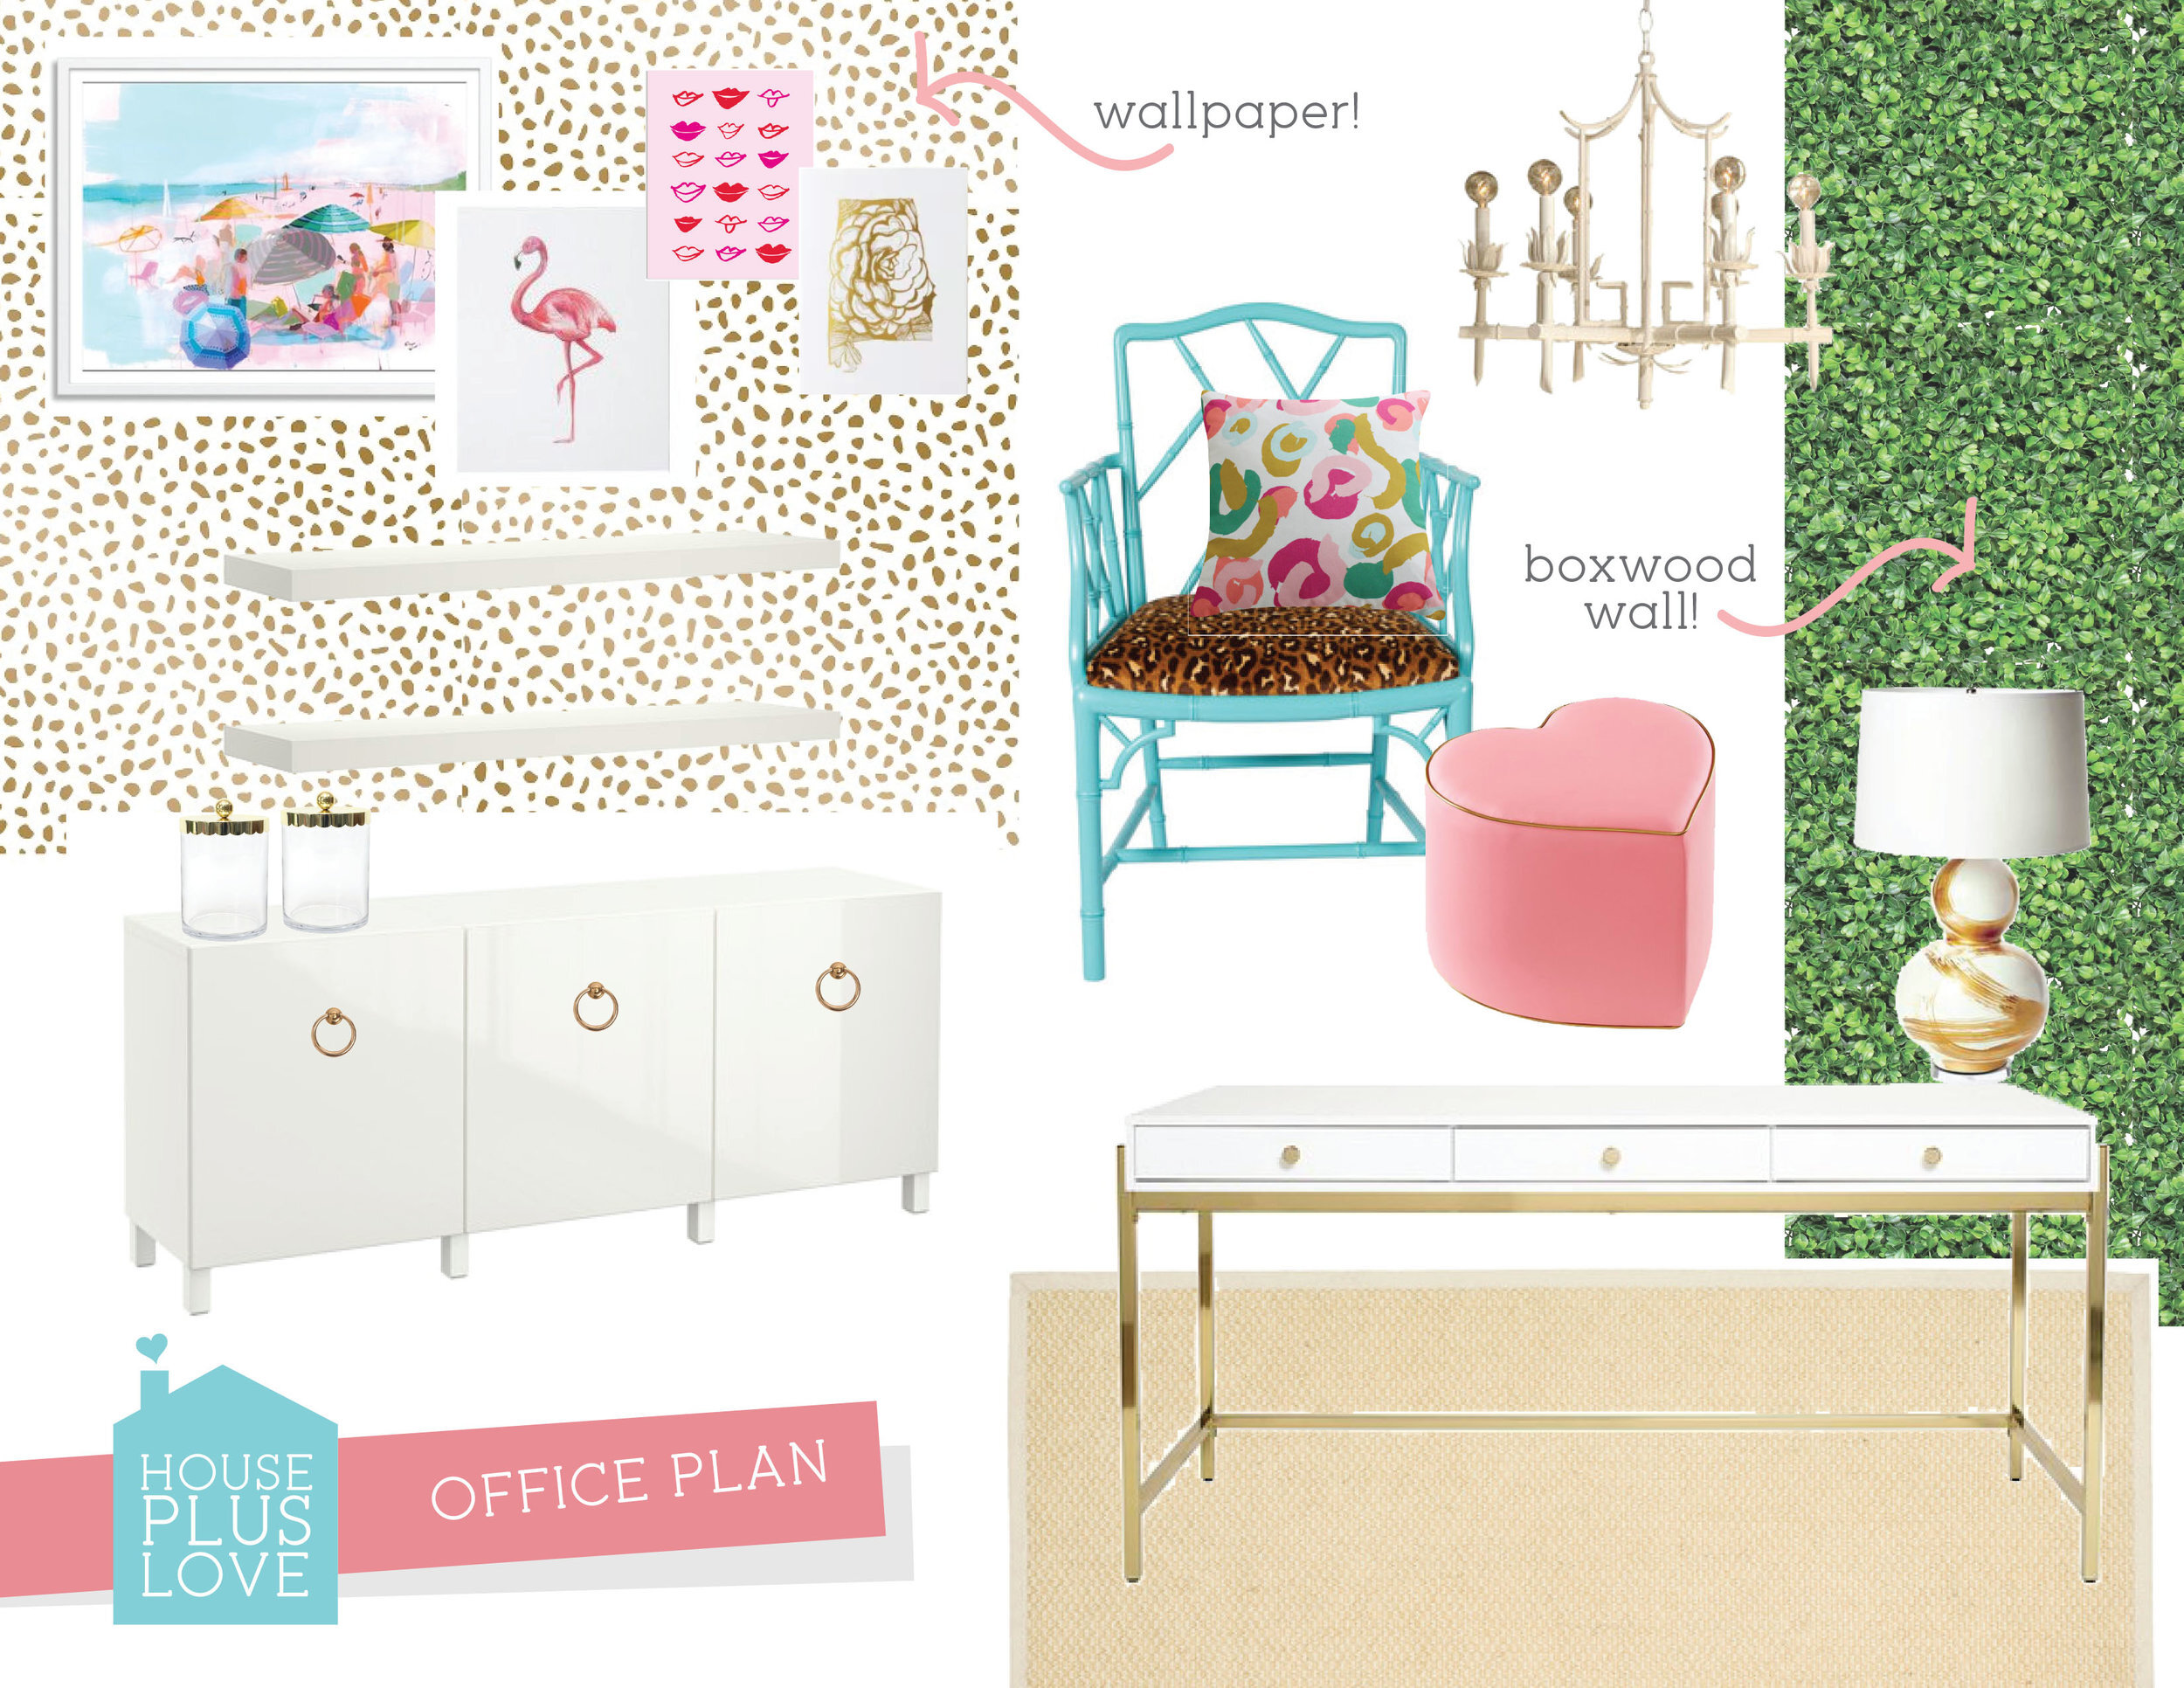
You'll remember that I have already tackled the wallpaper in week 2 and 3...so WEEK 4 brings us to another large design element in the space...the boxwood wall. Yes, you heard me correctly, a BOXWOOD WALL. Now don't go all crazy on me, it is a FAUX boxwood so no watering necessary! It is basically sheets of plastic hedge that is most often used in commercial or hospitality applications for privacy or added interest. In layman's terms...you know that fake plastic bush stuff that hotels sometimes use for privacy for the pool...yeah that stuff. Well I'm crazy enough to think, "hey that would be cool on my wall!". The idea first came to me due to my little side gig with Lifeguard Press! I am apart of the Lifeguard Press trade-show setup team which has the BEST trade-show booths that are designed by the wonderfully creative Natalie Chang. For a portion of the booth space, we install this boxwood for a dramatic wholesale display! I have always loved it and since I was experienced in the handling and installation of the product, it made the decision to GO FOR IT that much easier! So 3 boxes of plastic boxwood were ordered and shipped to my house!
It comes in 20 inch square sheets that fit together with tabs and can break down into 4 smaller squares that are 10 inches. Does that even make sense?! If not, refer to the photo provided below!


If you start at the top of the wall and work your way down, you can let gravity do a little bit of the work. Using a staple gun (I used my Craftsman with 9/16 staples), simply staple to secure to the wall. With your next piece, you'll be able to attach the squares to each other using the tabs. This will keep the square positioned long enough for you to staple into place. Using the tabs to adhere each square keeps you from having to use as many staples into your wall. If you are covering a wall with windows, doors, or a wall that is simply NOT an easy square; you'll be left with some awkward spaces to cover. But no worries!! The sheets can easily be cut with household scissors to any size to fit your needs! (Did that sound too much like a sales pitch?!) Once you have all the pieces stapled into place, you might need to "fluff" some areas to appear fuller! And remember it's "boxwood" growing on your wall, it isn't going to be perfect! (Wink!)

And there you have it! Me and my crazy idea for a faux boxwood hedge on my WALL! How about a little closer sneak peek...

Join us here next week on House Plus Love...oh sorry. But really, next week I'll be sharing some sources, a little tale of the invisible desk (that's right folks, a desk I ordered in July still isn't here), and how I keep projects like these organized! And then on Week 6...the BIG REVEAL we have ALL waited for!!!
Be sure to follow House Plus Love on Instagram and check out our Instagram stories to stay in the loop with our progress and all the "going-ons"! Also stop by the One Room Challenge participants as they share their transformations! I am SOOO excited about these spaces! And be sure to also check out the other linking guest participants for even more renovation goodness!! See y'all next week!